 First, you'll need to decide what fruit you want to incorporate into you fruit bouquet. We used fresh pineapple, strawberries, cantaloupe, grapes, watermelon, honeydew melon, oranges, and even though we didn't use parsley I would highly recommend getting some!
 Step 1. Using your knife, cut up your pineapple, half of honeydew melon, half of watermelon, half of cantaloupe into 1/2 inch thick slices.
 Step 2. Using the cookie cutter, press each slice of fruit and cut out a flower
Step 3. Using the melon baller scoop several pieces of watermelon, honeydew melon, and cantaloupe
*We also sliced grapes in half

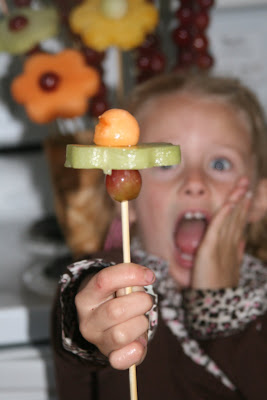
(Don't mind Addi's picture..HA!)
Step 4. Now add 2 grapes on the bamboo skewer. Add the fruit flower on top. Make sure the skewer pokes through the fruit. Push the fruit down leaving about 1/2 " from the top. Now stick that part of the skewer onto either a watermelon, cantaloupe, honeydew melon ball, or a half of grape. Don't let the skewer stick out the end. Do this for each "Fruit flower".
*The purpose of the grapes is to help support the fruit flowers so they don't slide down the skewer.
Step 5. Wash your strawberries (you can remove the strawberry leaves if you want). Add a few grapes on the skewer. Then take each strawberry and stick a bamboo skewer into the top of it, but don't let the skewer poke out the other side.
Step 6. Take a bamboo skewer and stick it through about 6-7 grapes. When you stick one grape on, slide it down to make room for the next one. Repeat this until your last grape. Make sure that the skewer doesn't stick out of the last grape (the one on top). Then slide each grape up the skewer until they touch the grape just above it. I made 7 of these grape skewers for this fruit bouquet.
Step 7. Put your floral foam into your vase or basket. (Don't use a clear vase, it's not pretty!!!)
Step 8. Now you should have all of your fruit on skewers. Place each skewer into the floral foam at various angles. You will want to create a spherical shape to the bouquet, so place the outermost skewers on a large angle and make them shorter than the center skewers. I had to break a few inches off some of the skewers to get them to the right height (I used kitchen scissors to help me break the skewers). This step is the most time consuming because you want the bouquet to look perfect. If you have trouble, just start putting in skewers into the foam. Then adjust each one to look how you want it. The key to this step is to adjust your skewer lengths. Don't be afraid to break a good part of the skewer off (if you break too much off, you can always use a new skewer - I had a LOT of extra skewers at the end). Another key to making your fruit bouquet look AWESOME is to have plenty of fruit. Having too few fruit skewers makes your fruit bouquet look bare and skimpy.

Step 9. Once all your fruit skewers are placed, place some twigs of parsley in-between the skewers. This fills in the bouquet, hides the skewers and makes it look more like a flower bouquet.
Once you have the parsley in place, YOU ARE DONE! WA-HOO! Your family will love you FOREVER!


 Fruit Bouquet


