Altered Recipe Box


As many of you know, I LOVE to cook. It seems appropriate for me to find a cute craft that is both functional and creative. That is where I found my little true love, the altered recipe box!
My sister Traci has an amazing house full of new and trendy home goods. I drool every time I go over to her house. Last time I was there I noticed a cute recipe holder she had sitting on her counter. I asked her where she got it and she said "My sister in law MADE it". You see Traci married into a family of crafters! Tasha (Traci's sis-in-law) made her a cute red and brown altered wooden recipe box, I wish I had a picture... but I don't. I like to look at things and figure out how to do them myself. So this is the one I made.

I have seen both the wooden recipe box, and the tin recipe box. I have the tin. Basically you modge podge (or deco podge) your favorite scrapbooking paper to the box, making sure it's covered. Add any cute embellishments on and around your box. Tie Ribbon around the handle of your box.


Measurement Equivalents Click HERE

Next, go to the website above and edit the measurment equivalents in word, PSE (or what ever you use), print it off and make sure it fits in the lid of your box.

I then got dividers (they are usually alphabetized) A-Z (find them at Walmart in the office section). I wanted to personalize mine, so I glued scrapbooking paper over the divider. Next, make tabs for the dividers. I used such dividers as:

Appetizers
Beverages
Breads & Rolls
Cookies & candy
Desserts
Fruits & Fruit Salads
Main Dishes
Misc.
Salads
Side Dishes
Soups
Vegetables
Websites
I glued on all the tabs to the dividers. Lastly, I stapled ribbon to each divider. Have fun!

For the wooden recipe box directions click : http://www.scrapjazz.com/topics/Techniques/Altered_Art/947.php
This is the instruction on their website:
Instructions:

Note: It's possible that all the steps that follow may not be necessary depending on the finish of the box you choose and how it's put together.
Disassemble the lid from the base using the small screwdriver. Put the hardware in a safe place.

If the box has a slick finish, use the sandpaper to roughen the surfaces so that it will receive the paint and adhesives better.

Paint the box both inside and out with acrylic paints. I used Liquitex Basics tube acrylics.

Measure the flat surfaces that you want to cover with scrapbook papers. Subtract 1/8" to ¼" from the length and width so that the papers can be centered and a border of the painted area will show. Cut papers to size.

Adhere the patterned papers with adhesive making sure to center them on the different surfaces of the box that are to be covered. I used Memory Mount but there are several liquid glues that will work well and not cause your papers to wrinkle.

Add any stickers or other embellishments desired.


Apply a sealer to all surfaces. I used Liquitex Matte Gel Medium. Allow to dry well.


Reassemble the box.


I used coordinating papers and stickers to make index dividers and fille the box with blank 3" x 5" index cards so that it's ready to use. I made the tabbed index cards by cutting papers to measure 3" x 5". The tabs are made of cardstock and measure 1 ¼" x 1 ½". I folded them in half, stapled them to the top of the patterned paper cards, and attached a letter sticker.


I want to give proper credit, but I copied these off the internet a long time ago and I'm not sure where I got them. But this person is very crafty!

Little Girl Hairstyles Blog Links

Okay, so my cousin Jadi found exactly what I was looking for. Some blogs about how to do girls hair. Here are a few links...enjoy!

Hairstyles:
http://shedoeshair.blogspot.com/
http://girlydos.blogspot.com/

Bow designs:
http://bowdesigns.50webs.com/index.html

A Few Hairstyles..Nothing Fancy

Curly Pony Tail


Part hair to the side. Comb the hair to the back to pull into a ponytail. Use hot curlers and leave in place for about 15 minutes. Take out curlers and add a ribbon!


French Braid


Here is a link to a YouTube Video in case you don't know how to French Braid:

http://www.youtube.com/watch?v=q6M7WzzYPWI

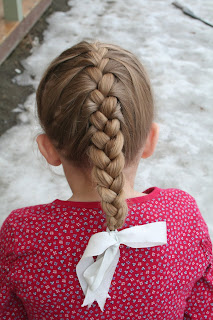
I learned how to french braid when I was little. I LOVED to do my sisters long hair. I still love to do my daughters hair, but as you can tell by the look on her face...she doesn't love it so much!


Quick Braid


Part the hair on the side. Pull both sides of the hair to the back. Do a braid..EASY!

Stick Strait Hair


I styled her hair using a Chi (or a flat iron). Addi's hair will dry naturally strait, but when I use the chi it gives it a lot of shine.

Organize Those Sheets!


I can't take credit for this BRILLIANT idea. I saw it on a website (for the life of me can't remember which one). The girl had used circular scrapbooking tags. It was really cute.
I was a little short on time and decided to print off a whole bunch of homemade tags. I used the Avery 8160 Template and just put thick card stock in my printer. I made three sheets. One for Queens, one for Kings, and one for Twin. Then I punched a hole on the outer edge of the tag. I wrapped raffia around the sheets, and put the appropriate tag around each bed sheet. Now there is no longer the guessing game as I change the sheets! Have Fun!

Cereal Box Magazine Holders


I came across THIS amazing website the other day. Tyanne is so creative! She is one of those "Crafty people" that I was talking about. Where do they come up with this stuff? Amazing! She used empty cereal and Popsicle boxes, cut them in half, and glued scrapbooking paper on it. It is so stylish, yet so practical. I was just telling Mike I needed to buy me some magazine holders, but I guess this solved my dilemma! You can visit Tyanne's website at http://www.inspiremecrafts.com/


(I asked permission to post some of her things, and she promptly replied that I couldso nice!, All I ask is that you check out her site! I'm sure this isn't the last thing I'm posting from her.)

Calling All Little Girls Hair Styles!


I know this isn't the best example of a "cute" little girls hairstyle, that's why I need YOUR help! I need your input. I would like to see the creative hairstyles you do for your little tot! Whether a baby, toddler, or little girl, I need Picts, & tutorials of them all. Please help!Please email them to me and I will post the picts. of the creative hairstyle you sent! Email me at(senderikaaletter@hotmail.com)
*This will be a work in progress and will not happen in one day, so feel free to send them whenever!

Where do these creative people come from?

I'm sorry I haven't been posting much on this blog. All my crafty stuff is still not unpacked from the move. So in the mean time I have been looking at other blogs and crafty websites. I am amazed at the talent out there. I was a little disappointed because every craft that I could possibly think of, has been done.Oh-Well! As for right now I will find the other crafty blogs and credit them and their ideas and links to their sites. You'll just have to enjoy their ideas for now!

How to design your own blog

This is a blog header I made for my husbands side of the family


I found a tutorial about how to design your own blog using digital scrapbooking paper. The webite asks that you do not re-distribute the instructions, so instead I will just link you to her site HERE . I had to play around with things a few times to get it, but after 4 blogs, I think I got it!
Go to http://ikeagoddess.blogspot.com/ to find free digital kits to download. (Or your other favorite digital scrapbooking site).
As far as the header goes, I actually googled how to do it, and I can't find the site I used, but I'm sure are many out there that would work just fine. I made the header using Photoshop Elements and then uploaded it to my blogger page. If you need me to find the specific instructions, I will try and find them for you.
Also, If you have any questions, please feel free to email me senderikaaletter@hotmail.com

Good Luck & Happy Blog Design!